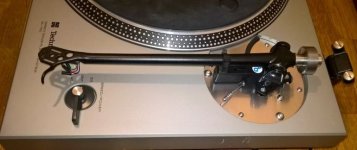
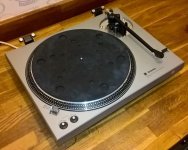
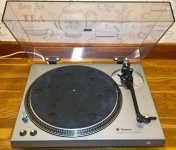
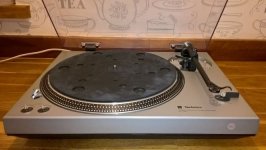
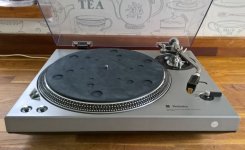
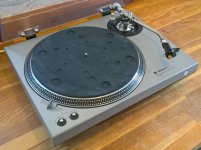
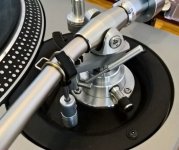
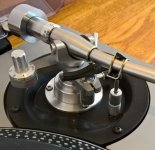
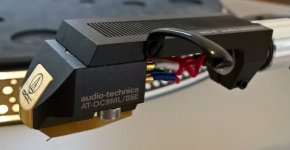
I was lucky to pick this up on quiet eBay weekend last year. It belonged to the seller's father and used to have an SME arm which was sold separately. From the pics it looked pretty tidy so I drove down to south coast to pick it up.
The seller turned out to be a real audio enthusiast, exactly the type of person you want to buy off, we had a good chat and I didn't spend long checking out the machine as I knew it would be genuine.
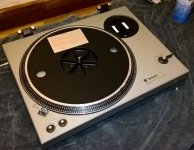
Cosmetically it looked great as the seller had cleaned it up using professional cleaners and even polished the lid. So I haven't posted any before pics as they won't look hugely different to the after ones!
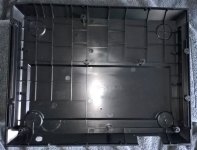
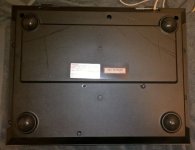
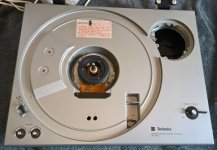
However that didn't stop me from doing my usual detailing. I first removed the base and unscrewed the collapsed rubber feet which is a common ailment on this series. I cleaned the base inside and out using foam cleanser and paint brushes to loosen any dirt. There are some unsightly marks from having the power cable coiled under the base plate which obviously got a bit hot and the marks can be seen in the pics.
The top plate, and platter was cleaned in a similar manner and I used a stiffer bristle nail brush on the strobe edge. I cleaned the power cable and fitted a nice older MK plug I liberated from another purchase. I removed the hinges to clean any trapped dirt.
I removed and cleaned the knobs and applied Deoxit to the pitch control turning them to ensure full coverage. I dismantled the power switch and cleaned and greased the contacts. Unlike the Q202 I worked on last year, the power switch is exposed and prone to deoxidation. However the design is robust and fundamentally sound. In fact, this description could apply to the entire machine which is well designed and easy to dismantle. Almost everything is attached using decent quality small Philips screws that didn’t strip and all came free without applying undue force. And compared to the automatic models there is not much to go wrong.
I cleaned up the wiring loom to remove that slightly sticky film that old plastic wiring can emit, and removed and polished the strobe lens.
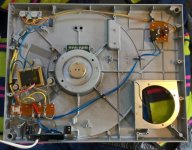
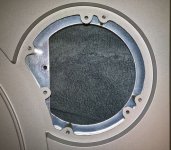
I removed the motor and noticed one of the bushes that cushion and decouple the motor from the top plate was missing. However after some rummaging about in my boxes of useful stuff i was able to fashion a suitable replacement using sticky backed high density foam and some centre punches. The compliance was pretty perfect so thanks be to the great god Blue Peter which taught me most things can be fixed with household detritus and glue!
I removed the bearing end cap and liberally applied some genuine Techy direct drive oil to both ends, spun it around and then let it sit overnight This really freed up the bearing and it now spins freely for a very long time.
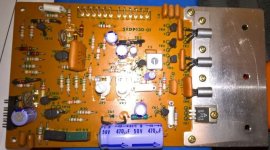
I unplugged and removed the PCB. I didn't like the look of the big 470uf cap so the board has been dispatched to be recapped.
I polished the lid using Meguires No 10 & No 17 clear plastic polish/cleaner which made it look even better and also washed and scrubbed the rubber mat in Fairy Dishwashing liquid. This 5mm mat ended up on my parents Q202 so I have sourced an improved mat for this deck.
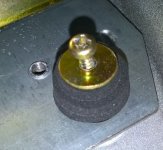
One of the bigger challenges was the feet, as the cutouts are designed to suit the small rubber hollow feet attached with tiny M3 screws. The plastic base is quite thin so not suitable for Isonoe feet at least not without making modifications to strengthen the mounting holes.
I found the 40mm diameter cutouts perfectly housed halved squash balls, however these do deform with time so not really a good long term solution.
Then I had the idea to try 40mm sorbothane hemispheres and found these fit perfectly. They even stay in place without any assistance which is just as well as tape or many glues don’t adhere to sorbothane.
So all in all a very easy and enjoyable deck to work on, though unlike an old idler, if something goes wrong it is likely to require the services of a skilled electronics engineer rather than a back yard mechanic!
The next challenge is working out how best to calibrate the variable resistors on the PCB board when it is returned. These are in addition to the trim pots accessible under the platter that act as coarse pitch controls. The manual is not very precise in this regards, as it doesn't mention if a speed should be selected or if the platter should be spinning or not when performing the measurements!
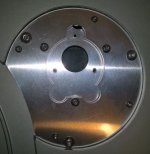
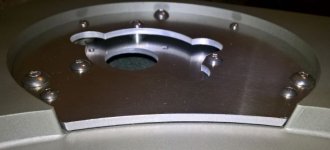
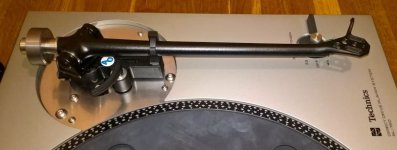
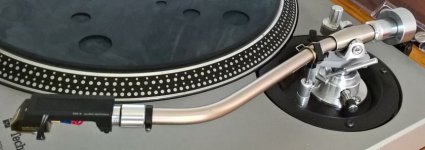
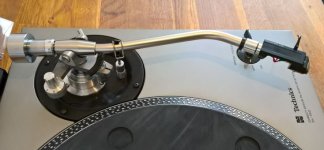
Then comes the arm and armboard which I will report on in future. "Its a Technics, should be easy" I thought. Let's just say that it proved more challenging than expected. But with expert assistance it is all coming good .
.
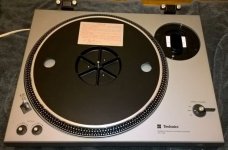
The seller turned out to be a real audio enthusiast, exactly the type of person you want to buy off, we had a good chat and I didn't spend long checking out the machine as I knew it would be genuine.
Cosmetically it looked great as the seller had cleaned it up using professional cleaners and even polished the lid. So I haven't posted any before pics as they won't look hugely different to the after ones!
However that didn't stop me from doing my usual detailing. I first removed the base and unscrewed the collapsed rubber feet which is a common ailment on this series. I cleaned the base inside and out using foam cleanser and paint brushes to loosen any dirt. There are some unsightly marks from having the power cable coiled under the base plate which obviously got a bit hot and the marks can be seen in the pics.
The top plate, and platter was cleaned in a similar manner and I used a stiffer bristle nail brush on the strobe edge. I cleaned the power cable and fitted a nice older MK plug I liberated from another purchase. I removed the hinges to clean any trapped dirt.
I removed and cleaned the knobs and applied Deoxit to the pitch control turning them to ensure full coverage. I dismantled the power switch and cleaned and greased the contacts. Unlike the Q202 I worked on last year, the power switch is exposed and prone to deoxidation. However the design is robust and fundamentally sound. In fact, this description could apply to the entire machine which is well designed and easy to dismantle. Almost everything is attached using decent quality small Philips screws that didn’t strip and all came free without applying undue force. And compared to the automatic models there is not much to go wrong.
I cleaned up the wiring loom to remove that slightly sticky film that old plastic wiring can emit, and removed and polished the strobe lens.
I removed the motor and noticed one of the bushes that cushion and decouple the motor from the top plate was missing. However after some rummaging about in my boxes of useful stuff i was able to fashion a suitable replacement using sticky backed high density foam and some centre punches. The compliance was pretty perfect so thanks be to the great god Blue Peter which taught me most things can be fixed with household detritus and glue!
I removed the bearing end cap and liberally applied some genuine Techy direct drive oil to both ends, spun it around and then let it sit overnight This really freed up the bearing and it now spins freely for a very long time.
I unplugged and removed the PCB. I didn't like the look of the big 470uf cap so the board has been dispatched to be recapped.
I polished the lid using Meguires No 10 & No 17 clear plastic polish/cleaner which made it look even better and also washed and scrubbed the rubber mat in Fairy Dishwashing liquid. This 5mm mat ended up on my parents Q202 so I have sourced an improved mat for this deck.
One of the bigger challenges was the feet, as the cutouts are designed to suit the small rubber hollow feet attached with tiny M3 screws. The plastic base is quite thin so not suitable for Isonoe feet at least not without making modifications to strengthen the mounting holes.
I found the 40mm diameter cutouts perfectly housed halved squash balls, however these do deform with time so not really a good long term solution.
Then I had the idea to try 40mm sorbothane hemispheres and found these fit perfectly. They even stay in place without any assistance which is just as well as tape or many glues don’t adhere to sorbothane.
So all in all a very easy and enjoyable deck to work on, though unlike an old idler, if something goes wrong it is likely to require the services of a skilled electronics engineer rather than a back yard mechanic!
The next challenge is working out how best to calibrate the variable resistors on the PCB board when it is returned. These are in addition to the trim pots accessible under the platter that act as coarse pitch controls. The manual is not very precise in this regards, as it doesn't mention if a speed should be selected or if the platter should be spinning or not when performing the measurements!
Then comes the arm and armboard which I will report on in future. "Its a Technics, should be easy" I thought. Let's just say that it proved more challenging than expected. But with expert assistance it is all coming good

Last edited by a moderator:


